Saturday 30 November 2013

Creating with BaRb blog-Stampin'up-Little lanterns

Little lanterns
Hello there
Today I am showing you the project from one of our most popular sessions
These little lanterns are simply small boxes and lids with extended corner strips and acetate side panels. They have a scalloped die cut square added to the top and base, and a small inside box base, with a circle diecut into the centre to hold the battery operated tealight candle in place. The box and lid side panels are decorated with papers and ribbon or glittered strips. The acetate panels are decorated with a glittered bird and leaves using the bird builder punch, and die cut glittered snowflakes . The smaller lantern has peeloff outline stickers which were coloured using glaze pens.

Top view of the lids. These have been decorated with papers, linen thread, punched and diecut leaves and snowflakes, and brads and ribbons. Glitter glue has been used around the edges of the lids and bases.
The lids are easily removed to turn your candle on and off.
Enjoy your little lanterns.
Thanks for visiting and happy crafting.
BaRb

Jewellery gems.

Hello
Another couple of  Jewellery sets  for you today.


This first set is created in  flourite gemstone rounds and rectangles and features carved flourite roses.
Fittings are in gold metal.


This second set is in peridot and features a dichoric glass pendant. Fittings are also in gold metal.

These items are available, along with other of our handcrafted items in our online shop.
Please visit us there.

Thank you for dropping by today.
Until next time
BaRb

Wednesday 27 November 2013

Stampin'up Christmas Shaker cards


Hi there
Yes - more Christmas- this time some shaker cards


This first card is navy and brushed silver.
The shaker box is on the front of the card, and is filled with glitter. The snowflake image from Snow swirled was first embossed in silver and the small snowflakes are stamped in silver metallic ink. The greeting is also embossed in cherry cobbler. The silver shaker frame was embossed in the petals a plenty folder.


This second card is an aperture style front with the shaker positioned on the inside back of the card.
Christmas lodge was stamped and coloured with watercolour pencils. Snowy edges were highlighted with glitter glue. A frame was made using foam tape and acetate and glitter added for shaker material. The card  inside was then covered with paper and a frame to match the card front was cut from shimmer card. The greeting was embossed, and rhinestones added.


This card has the shaker on the front of the card. The image (Christmas deer) was stamped on vanilla card, a frame formed around it with foam tape,  gold glitter added then covered in die cut acetate, and a die cut frame in brushed gold card was taped to the front. This box was then taped to the card front. A banner greeting, a ribbon and some rhinestones finished off.


                       I hope you have found some inspiration here to try your own shaker cards.
                                                                    Happy crafting
                                                                            BaRb


Monday 25 November 2013

Crochet Flowers .....

Hello!

Yes I know - crochet flowers - I had not done any crocheting for many years!  I am following a pinterest board with many, many crochet designs featured.  So, I googled some flowers patterns - found an easy one to start with and started crocheting.....


This is a selection of the colours I have made already - I have been using crochet cotton I already had from other various projects.  Cute aren't they?  Great for cards, scrapbooking, canvases - any project really - sew them on your hat or your bag.... list is endless .....

If you are (in Australia) interested in purchasing any of these little flowers, please link onto our Online Store - they are packaged in packs of six.

Thanks for visiting again
Shell
xox

Sunday 24 November 2013

Kaisercraft Collectables - Christmas Cards

 Getting closer and closer....  Christmas that is!

More Cards to show you today - these were quick and easy to make - using the square pack of cards again and some of this years Christmas Collectables from Kaisercraft - I used a couple of different packs:


Metallic Paper, Red Cardstock, Embossing Folders, Patterned Papers, Rhinestones, Ribbon, Stardust Pens, the Merry Christmas' are from a party confetti pack where you get 100s of them - I adhered them with a Xyron sticker machine - these are the other products I used to complete these cards.
 
Enjoy the rest of your weekend
Shell
xox


Saturday 23 November 2013

Hero Arts Decorative Ornament Christmas Cards

Good Morning - it's the weekend again - which means there are only two more weeks left of school for some of us!!

I have shown you my tags I created using the Hero Arts Decorative ornament stamp - here are the cards I created using this stamp:


 I don't often make square cards - but when I found a pack of square cards with envelopes and was able to buy  a pack of matching paper - I knew I was making some square cards this year!  The card they are made of is a kind of metallicy (is that a word?), shimmery - pearlescent like card. Beautiful!!
 I made a red version - layering onto a red metallic paper.


 A silver version and a gold version.  The gold card was not square as you can see - but looks just as effective using normal white card with a glittery embossing powder.


Back again soon with more of my Christmas Cards,
See you then
Shell
xox

Friday 22 November 2013

Not just paper, stamps and ink

Hello
Just when you were starting to think we were only about paper, stamps and ink, I have decided to surprise you with some of our other creations

This necklace, bracelet and earrings set is made from amethyst and iolite natural gemstones, with a dichoric glass pendant. Fittings are in silver metal.
                                            We will show more of our designs in coming posts.

I hope you enjoy today's visit and that you will come again soon.
BaRb

Tuesday 19 November 2013

Stampin'up Christmas Postcards

Hello there
As a change to the usual card, this time I created some Postcards. Of course there also had to be a folder to place them in.
This photo shows the closed folder, the envelopes and the greeting side of the postcards
I have used crumb cake and white card and gold and silver metallic and versamark inks, Cherry cobbler, gold and silver embossing powders. Stamp sets used were Warmth and wonder, Christmas collectibles, Best of Christmas and Mosaic Madness and Wishing You. Ornaments were stamped, embossed and punched out. A small image was stamped using markers, the edges distressed and then attached to the card and acts as the stamp. All elements were attached flat to the postcards.

This second photo is again of the folder, envelopes and the reverse side of the postcards.
The sentiments are from Christmas messages and are stamped in olive and gumball inks with cherry cobbler berries. The snowflakes are in silver.

This final photo is of the opened folder with the postcards and envelopes in place.
Holes were punched with the crop-a-dile and eyelets inserted on the outer edges.
A ribbon was then threaded as a closure.
This Project was fun to make and would make a lovely gift.

I trust you have enjoyed your visit
Please call again
BaRb


Hero Arts Decorative Ornament Christmas Tags

Dashing through the snow.....

Sorry no snow here - just more summer!!  I made these tags using one of my favourite ornaments - Hero Arts Decorative Ornament.  I wish I could say the idea was my own.... hehe -  but Thanks BaRb for the fantastic idea of heat embossing the ornament onto metallic paper!  - have a look.....


I had a limited number of silver bells - so I red embossed onto silver metallic paper, used background papers and strips from my stash and rhinestones for the bottom corner.  Tied a small silver bell around the top of the ornament and my charm for this year is a glass snowflake.


 I used gold bells and gold metallic paper for these ones - makes a difference doesn't it - changing the slightest thing.


A closer view of a gold version and yes I made them in bulk!..
 
I think I just about have all my Christmas goodies prepared for this year - better check my list!!
Enjoy the rest of your day!
Shell
xox

Monday 18 November 2013

Spellbinders Shapeabilities Window 2, Darice Embossing Essentials Folder - Brick Pattern

Hello again, nice to have you back!!

It seems like I have been creating in bulk lately - Christmas Tags, Christmas Cards, Pillow Boxes, Teacher cards - oh that's right that is what I am showing you today.... Bulk Teacher Cards - World Teachers' Day was in October and I spent a little bit of time (just a little) on creating these cards for all the wonderful Teachers and Staff I have the privilege of spending part of my days with.  I made 65 cards as follows.....

 
I used a black card base with rounded corners (Corner Chomper).  From the cream coloured card I cut the window using Spellbinders Shapeabilities Window Two die first, then embossed the negative part of the cream coloured card using Darice Embossing Essentials Folder - Brick Pattern.  I lightly sponged Distress Ink - Tea Dye over the top of both the window and the brick wall.
 The grass was cut using Stampin' Up's Pear Pizazz Card and a Sizzix Grass Strip Die. The butterflies are a Stampin' Up Punch - Bitty Butterflies and the flowers are also a Stampin' Up Punch - Spring Bouquet. Silver rhinestones on the butterflies and in the corner of the card and a small brad for the centre of the flowers finished it off.


I made a few different colours as shown above.  The words across the window sill says "Through the classroom window" - I typed this up on word and printed them out.
 
 
All 65 cards lined up - looked really amazing.
 
 
A close up view of a selection of the colours.

 
A nice little stack of cards - all lined on the inside. The inside held a Poem/Verse which I wrote myself  called "Through the classroom window - I have noticed....."
 
I wrote 8 small verses about some of the fantastic things I have noticed 'through the window' and my Principal handwrote a personal message in each card - phew I think I had the easy part - I typed all mine!
 
And that is my Teachers' Card - hope you thank your Teacher / Child's Teacher for the amazing job they are doing through your classroom window - whether it be at School, at University, at Tertiary Education or even your creatively inspiring "Craft" Teacher - please remember to say thank you and let them know how much you appreciate their sharing of their knowledge!!
 
Thank you to all those who "Teach" me on a daily basis!!
Shell
xox 

Saturday 16 November 2013

Exciting, Exciting Exciting!!!

Good morning!


Great News!!!  Thank-you to all the fantastic crafters who keep checking in on our Blog to see what we have been up to!  We really appreciate your regular visits to admire and hopefully be inspired by our love of creating.  We have some great news for our fellow crafters  who live in Australia (sorry if you live outside of Australia – you can still share in our news though!).   We have opened an online store – yay – exciting huh?!?!?  We are part of the handmade crafters operating under 
“The Handcrafted Shop” online stores.  Which is a Unique Virtual Handcraft Market.    
                    You can find us at http://www.thehandcraftedshop.com/
 
Click onto Stores then look for us -
BaRb'n'ShEll Creations
 
As we have only just ‘opened’ – we will be continuously adding products to our Store.  Please feel free to have a look and if there is anything in particular you are looking for – please send us an email, we will be more than happy to try and help you.
Happy Shopping,
BaRb and Shell
xox

Thursday 14 November 2013

Creating with BaRb blog-Stampin'up-Mosaic Madness

Mosaic Madness
Hello
 This stamp and punch set lend themselves beautifully to being a Christmas Ornament Card

I have used Cherry cobbler as the card base. The paper bow is die cut in Modern medley music paper and the large scalloped oval in  cherry cobbler, from regals stack. The embossed oval is in vanilla and the ornaments are stamped on white card and embossed in silver, gold and cherry cobbler. Bakers twine forms the hangers and rhinestones finish up. The sentiment is from Joyful Christmas and is embossed in silver.
This is a quick and easy card, great if you are making several.
Thanks for visiting, and enjoy your crafting.
BaRb

Tuesday 12 November 2013

Stampin'Up - Flower Shop

Hello
The year is now winding down quickly, Time for those gifts for work colleagues and the kids' teachers
This desk calender is one which you can personalise


I have made the base and backing  from scored and folded A4 natural ivory card. Cloud embossed pool party forms the background.
The calender backing and photo mat are Pear pizazz, as is the paper. The flowers are stamped on white card, 3 each in calypso coral, wisteria and saffron, punched out and sponged.
The sentiment is black embossed. The tall leaves are from Secret Garden, stamped in versamark and embossed in wasabi.
The little bird is punched from island indigo card, painted with shimmer, and coated in crystal effects.The leaf sprigs are also coated in crystal effects. The saffron flower on the bottom left also has crystal effects.
The flowers are touched up with shimmer paint, and have sparklets or rhinestone centres.
A small double saffron butterfly, finished with a linen thread tied natural button flies from the top corner.
I hope you have gained some inspiration from this, and have enjoyed your visit.
Till next time
BaRb


Saturday 9 November 2013

Mini Album - Max's Backyard - Part 2

Back Again,

Here is the rest of my Max's Backyard Album..... (Ahem, remember there are No blurry photos here....hehe....)

Continuing inside pages and back cover:


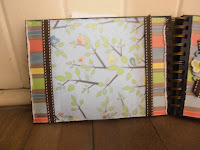
Lots of photo mats just made by double layering the co-ordinating pages and double sided taping them together. Some have die-cuts on them - some have banners and others are just blank - or cut with decorative scissors.

I haven't played in Max's Backyard yet - but the dragonflies and butterflies are absolutely beautiful over there.....hehe!
Have a great day!
Shell
xox


Tuesday 5 November 2013

Mini Album - Max's Backyard, DCWV Shapes

Hello,

Another Mini Album for you....  I cannot remember sorry... the brand of the paper I have mostly used - Die Cuts with a View is the brand of some of the products and Max's Backyard was the name of the set of Die- cuts - the dragonflies, butterflies etc.

I will show you half of the album today and the other half another day.  I also apologise profusely for the blurriness of the photos - my camera does not seem to be happy with me at the moment (shh  - it knows I borrowed a friends camera recently and have fallen in love with it and would like one of my own shhhh!)  Anyhow - pretend the photos aren't blurry and we are all happy!!! Here is the front cover and the first of the pages....


I made the album using my Zutter and black pages. Lots of places to add photos or journaling.
I have used assorted ribbons and twines. Chip-board shapes and die-cut shapes are really nice to work with and add instant dimension.  Hope you like the first pages of the album I am calling "Max's Backyard Mini Album".
 
Look for the other half soon,
Shell
xox