Sunday, 12 January 2014

Christmas Cards, Tags etc

Hi,

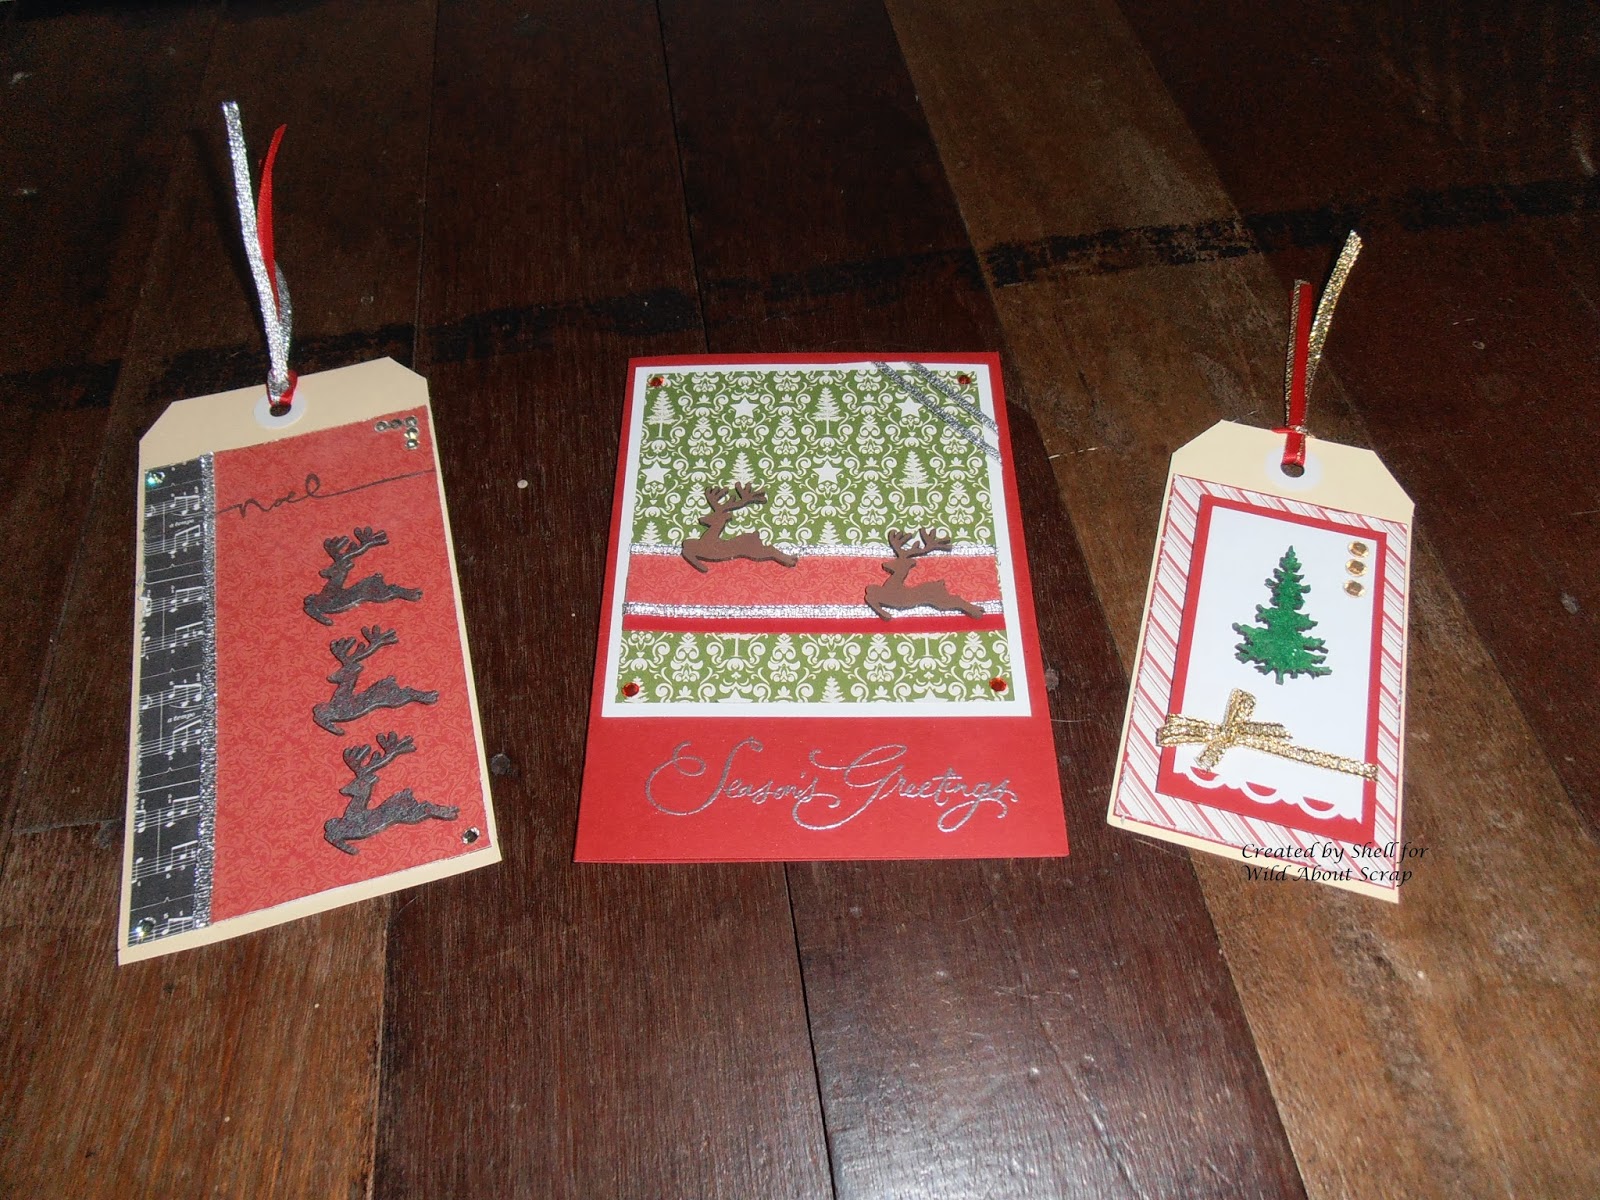
Well, the bells have all jingled and the gifts have all been delivered for Christmas 2013 - but I just realised I had not shown you the Cards and Tags I had made using leftover products from the Advent Calendar I made for Wild About Scrap.


Some of the above have been featured on Wild About Scrap's Blog - with instructions and a list of products used on each.  I basically used leftover papers and paint and added Kaisercraft and Dusty Attic wooden and chipboard embellishments - reindeer, trees and holly and also used some of the Tim Holtz Dies to create these Tags and Cards.  Sorry they are a bit late for Christmas - early ideas for Christmas 2014 perhaps?!?

Thanks for looking
Shell
xox

Button Heart Canvas

Hello, how's things?

Buttons, buttons everywhere...  Are you like me and have a stash of buttons - all different shapes, sizes and colours??  I remember when I was a little girl at school there was a saying - "Find a penny, pick it up, all day long you'll have good luck!!  (Heard that one before haven't you?!?)  Anyway, one of my little school friends changed it and said - "Find a button, pick it up, all day long you'll have good luck!"   So, every button I saw from then on - I picked up - okay, maybe this is where my collection started.....

Today we have a project from our  "Guest Designer" - Riss.  This is one her fantastic creations - a Heart Canvas - made using buttons.


Looks fantastic - doesn't it!?!  Love the different shapes, sizes and colours used here!  Notice the lady beetles in there? 

This is one of those projects that the longer you look at it - the more things you seem to see!!
We will be featuring more of Riss's Crafty Creations.

Make a button creation today!
Shell
xox

Saturday, 11 January 2014

Melted Crayon Canvas

Hello,

Have you ever melted a crayon??  This melted crayon technique is really amazing to watch!! Riss created this canvas after seeing one her cousin had made - it was shown on a television show - (I think "Better Homes and Gardens"???)


Great isn't it!  First Riss laid out her crayons in the colour pattern she liked - then used a hot glue to glue them into place.  Then, very carefully as the wax from the crayons can get very hot as it melts - she melted it with a heat gun.  As you are controlling the gun you can decide how much or how little you melt the crayon!!

Cool technique huh!
See you again soon,
Shell
xox


Multi Media Canvas

Hello Multi Media Lovers!

I happened across (as you do!) a blog from an unbelievably creative artist - Finnabair...  If you have not seen any of her creations - you need, yes I said need to check out her blog (I have put a link to her blog to the right).  I was so inspired - I just had to make a Multi Media Canvas of my own...


The piece I based my theme on for my canvas was the chipboard dressing table/duchess.  It inspired me to create a little girl's room - as if I was looking into the room -  through the open curtains. 


I created this Multi Media Canvas for an 11th Birthday Present.  If you look closely you can see that I have used many, many different types of goodies.  I raided my Husband's shed and found lots of things there, raided my buttons and all my little bits and pieces of things - I have even counted some of the elements to make sure there was 11 of each i.e. 11 butterflies, 11 dragonflies, 11 hearts, 11 stars, 11 Lady Beetles etc, as well as using a chandelier, a starfish, an angel, a bird, an owl, flowers - so, so many things....

First you prepare your canvas (gesso), then start adding all of your goodies - time consuming but sooo much fun!  Then you coat it all in gesso again to prepare it for whatever (paint/spray...) type medium you will be colouring your canvas with, then colour away!  I used watered down acrylic paint for my canvas, which I applied using a fine paintbrush to make sure the paint went into all the little gaps between all those elements!

As you can see - you can use absolutely anything on a Multi Media Canvas - So when you hear people say that they don't throw anything away - this is where they use it!!.  I have created a couple of other canvases and I will show them to you soon.

Happy Creating
Shell
xox  


BaRb'n'ShEll Creations - Online Store reminder

Hi,

Just thought I would quickly make a post with a reminder on how to find our online Store...


You can click on our link to the the right or

go to

www.thehandcraftedshop.com


Once you get there, click on Stores and scroll until you find us -

BaRb'n'ShEll Creations


(The stores used to be arranged alphabetically, but now they are randomly arranged - so please keep looking until you find us - more and more stores are being added all the time - so many crafty people out there!!)

Happy Shopping,
BaRb and ShEll
xox


Tuesday, 7 January 2014

Mini Album - All Male - Birthday

Morning,

Male Albums can be a little bit tricky for some - I think if you just keep them fairly simple you can't go too wrong.....

BaRb gave me 3 sheets of "Male" oriented cardstock embellishments from a magazine so I decided to make a mini album.


I created the album itself with my Zutter, using packaging for the front and back cover, and used black pages.


 I raided my paper leftovers to cover the pages with - you may recognise some of the colours from my Mini Travel Album...

When using the cardstock embellishments I tried to group them as a set i.e. the ones I used on this page are all nautical themed and I then stamped more sea images to continue the theme on the pages a bit more.


No. 1 - Best in the world!


I Like these ones - "Shed - by Appointment only and Pottering in Progress - do not disturb".  How many males in your life have a shed??


"Pale Male"


Travel Themed.


So I could keep the Album a bit more general, I placed the specific i.e. father, brother, son, football hero etc cardstock embellishments in a zip lock bag in the back of the album.


The back cover.

I chose the colours of the papers to match with the embellishments - reds and blues are always very safe for male colours.  I will be putting this album on our Shop - so if you live in Australia and would like to purchase this album - please link through to our Online Store.

Have a great day
Shell
xox


Sunday, 5 January 2014

Picture Frame - Tim Holtz Elegant Flourishes

Good Morning and a Happy New Year!!

I am terribly sorry - I must apologise as it has been a whole week since we blogged!!  Where has it gone? Well let's see Friend's Birthday, Brother-in-laws Birthday, Mother-in-Laws Birthday, New Years eve and Day, Lunch with a beautiful friend - yes I can see where it has gone....  Hoping you have started the year happily and healthily!!

My first project of the year is a picture frame - as soon as I saw it in the shop all I could think of  was - oh the things I could do with that.  It was a plain white frame with birds and branches formed into the frame - hard to explain actually - this is what I did with it...


First, I laid the flowers in position, then decided to add the green leaves.  The birds needed eyes - which then led me to black brads for the flower centres.  Black Rhinestones in the bottom corner and I still felt it needed something black to balance it all out - so I used a glossy card from packaging and die-cut Tim Holtz Elegant Flourishes and placed them under the flowers - perfect!

As the frame was very elegant already (but the stark whiteness was too much) I only needed to add something very simple to keep within it's elegance and not make it too overdone.  What do you think?

Hope you have time to create something beautiful today,
Shell
xox